Ceiling studwork
With the floorboards laid I could now proceed with the ceiling.
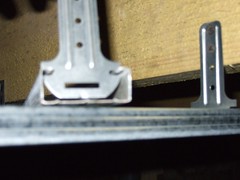 The plasterboard for the ceiling is screwed to metal rails suspended from the rafters I fixed in last week. From the photo you can see a complete rail and bracket fixed to the rafter. Resting on top of the rail is a scrap piece and the bracket to show how it fits together. The brackets are simply screwed to the rafters at 40cm centers and once in place the rail is pushed onto the brackets and hangs there.
As usual getting everything level was important. The hardest part of the job was the measuring and levelling. It's really difficult on your own to measure long distances or hold a level with one hand and measure with the other whilst up a ladder. In the end I used bits of string stretched tightly across the room at the correct height. It did mean a lot of up and down and moving step ladders but I got there in the end. The bottom edge of the rail is set at 2.5 meters (plus 13mm for the plasterboard) above the lowest point of the finished floor height. Using the strings as guides each bracket is screwed to the rafters. Various lengths of brackets are available, so it's not too important that the rafters are level as the brackets take up any slack.
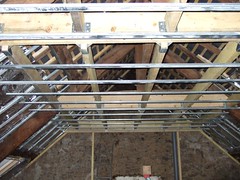 All the brackets and rails in place as shown. Personally I find that using this metal rail system really easy and prefer it to using wood. Also there is no danger of rot or woodworm and all the rails are straight and consistent. Now the rails are up I can order my plasterboard and fit the electric cabling for ceiling lights and put up the plasterboard. With the ceiling in place the internal stud walling can be considered.
At last things are starting to take shape.
| 1:40:52 PM